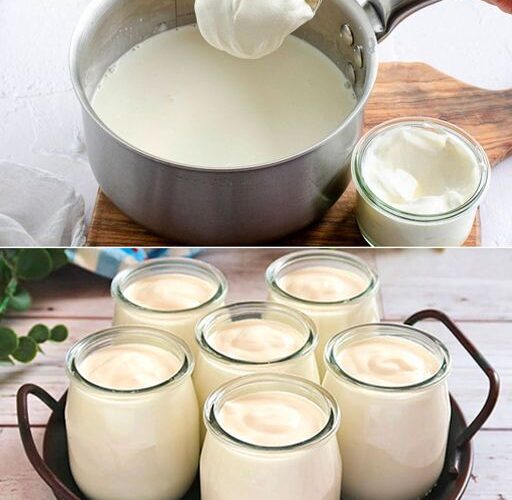
If you love the thick, creamy texture and rich flavor of Greek yogurt, why not try making it yourself at home? Making your own yogurt is surprisingly easy and allows you to enjoy fresh, healthy yogurt without added preservatives or sugar. Plus, it’s a fun and rewarding process!
Greek yogurt is known for its creamy consistency and tangy flavor, and it’s packed with probiotics that are great for your digestive health. Best of all, it’s incredibly versatile – you can enjoy it on its own, add it to smoothies, use it as a topping for fruit, or even incorporate it into savory dishes.
Here’s a simple guide to making homemade Greek yogurt.
Ingredients:
- 4 cups of whole milk (you can also use 2% or skim milk if you prefer)
- 2 tablespoons of plain, unsweetened Greek yogurt (store-bought or from a previous batch)
- 1/4 cup powdered milk (optional, for extra creaminess)
- 1 tablespoon of honey (optional, for sweetness)
Equipment:
- A heavy saucepan
- A thermometer
- A whisk
- A large bowl
- A clean towel or blanket (for insulation)
- A container with a lid for storage (like a mason jar or a glass bowl)
Instructions:
- Heat the Milk: Pour the milk into a saucepan and heat it over medium heat. Stir it occasionally and use a thermometer to monitor the temperature. Heat the milk until it reaches about 180°F (82°C). This step helps to denature the proteins in the milk, ensuring the yogurt will set properly.
- Cool the Milk: After the milk reaches 180°F, remove it from the heat and let it cool down to about 110°F (43°C). This is the optimal temperature for adding the yogurt starter.
- Add the Yogurt Starter: Take a small bowl and add 1/4 cup of the warm milk. Whisk in 2 tablespoons of plain Greek yogurt until it is fully dissolved. This mixture is your “starter” culture, and it contains the live active cultures necessary for yogurt fermentation.
- Incorporate the Starter into the Milk: Once the milk has cooled to 110°F, whisk the starter mixture back into the warm milk, ensuring it’s evenly distributed.
- Let the Yogurt Set: Pour the milk mixture into your container (a glass bowl or mason jar works well). Cover the container with a lid and place it in a warm spot where it can stay undisturbed for several hours. You can use a warm oven (turned off but with the light on) or wrap the container in a clean towel or blanket to help it stay warm.
- Fermentation Time: Let the yogurt sit for 6-12 hours, depending on how tangy and thick you want it. The longer it sits, the thicker and more tart it will become. Check it after 6 hours to see if it has reached your desired consistency.
- Chill the Yogurt: Once the yogurt has set, move it to the refrigerator and let it chill for at least 2-3 hours. This will help it firm up further and develop a smoother texture.
- Strain for Greek Yogurt: If you prefer thicker Greek yogurt, you can strain it to remove some of the excess whey. Place the yogurt in a cheesecloth or fine mesh strainer over a bowl and let it drain for a few hours or until it reaches your desired consistency.
Tips:
- Flavoring: You can flavor your homemade Greek yogurt by stirring in honey, vanilla extract, or fruit puree after it has set and chilled.
- Storing the Yogurt: Homemade Greek yogurt can be stored in the refrigerator for up to 1-2 weeks. Keep the yogurt in an airtight container to preserve freshness.
- Reusing Starter: You can save 2 tablespoons of your homemade yogurt to use as a starter for your next batch. Just make sure to store it in a separate jar so you don’t contaminate the rest of the yogurt.
Why Make Homemade Greek Yogurt?
- No Additives: When you make Greek yogurt at home, you control exactly what goes into it, and you can avoid preservatives and unnecessary sugars that are often added to store-bought varieties.
- Better for Your Health: Homemade Greek yogurt contains beneficial probiotics, which can support gut health, boost your immune system, and improve digestion.
- Cost-Effective: Greek yogurt can be expensive at the store, but making it yourself can save you a lot of money in the long run.
- Customization: You can experiment with different flavors, sweetness levels, and even types of milk (like almond or coconut milk) to suit your taste preferences.
Conclusion:
Making homemade Greek yogurt is easy, affordable, and rewarding. Plus, you get to enjoy the delicious, creamy results knowing exactly what ingredients went into it. It’s the perfect snack for breakfast, a topping for desserts, or even an ingredient in savory dishes!
If you loved this simple recipe, don’t forget to like and share it with your friends! Let’s spread the joy of homemade, healthy yogurt to everyone!